williams sonoma bread machine manual
This manual provides a comprehensive guide for the Williams-Sonoma Bread Machine, offering step-by-step instructions and expert tips for optimal performance, safety, and delicious results.
1.1 Overview of the Manual’s Content
The Williams-Sonoma Bread Machine Manual is a detailed guide designed to help users master their bread maker. It covers essential topics such as safety precautions, operating instructions, and maintenance tips. The manual includes step-by-step guides for basic and custom settings, ensuring users can create a variety of bread recipes. Additionally, it provides troubleshooting solutions for common issues and offers tips for customizing recipes. The document is available in PDF format, making it easily accessible for reference. Whether you’re a novice or an experienced baker, this manual ensures you get the most out of your Williams-Sonoma Bread Machine, with clear instructions and expert advice for perfect results every time.
1.2 Importance of Reading the Manual Before Use
Reading the Williams-Sonoma Bread Machine Manual is crucial for safe and effective use. It provides essential safety precautions, such as avoiding hot surfaces and proper handling, to prevent accidents. The manual also explains how to operate the machine correctly, ensuring optimal performance and delicious results. By understanding the functions of the control panel and custom settings, users can tailor recipes to their preferences. Additionally, the manual offers maintenance tips, like cleaning and caring for the bread maker, to extend its lifespan. Ignoring the manual may lead to improper use, potentially damaging the machine or resulting in poor baking outcomes. Taking the time to read the manual ensures a seamless and enjoyable baking experience with your Williams-Sonoma Bread Machine.

Safety Precautions and Guidelines
Always follow safety guidelines to ensure safe operation. Avoid touching hot surfaces and handle the machine by its base. Regular maintenance and proper cleaning are essential for longevity.
2.1 Essential Safety Tips for Operating the Bread Maker
Operating the Williams-Sonoma bread machine safely requires attention to key precautions. Always read the manual thoroughly before first use. Ensure the machine is placed on a stable, heat-resistant surface away from flammable materials. Avoid touching hot surfaces, as they can cause burns. Use oven mitts to handle the bread pan or paddle. Never leave the bread maker unattended during operation, especially when children or pets are nearby. Keep the area around the machine clear of clutter to prevent accidents. Unplug the machine when not in use or during cleaning. Avoid submerging electrical components in water. Regularly inspect the power cord and plug for damage. Follow these guidelines to ensure safe and efficient bread-making experiences.
2.2 Pre-Use Checks and Maintenance Tips
Before using your Williams-Sonoma bread machine, perform a series of pre-use checks to ensure optimal performance and longevity. Inspect the power cord and plug for any signs of damage or fraying. Verify that all parts, such as the bread pan and kneading paddle, are securely in place. Clean the machine and its components regularly to prevent dough residue buildup. After each use, wipe down the exterior with a damp cloth and avoid using abrasive cleaners. For maintenance, occasionally soak the bread pan in soapy water to remove stubborn stains. Always unplug the machine before cleaning. Proper care and regular inspections will help maintain your bread maker’s efficiency and extend its lifespan. Refer to the manual for detailed maintenance schedules and troubleshooting tips.
Understanding the Williams-Sonoma Bread Machine Parts
The Williams-Sonoma bread machine features a bread pan, kneading paddle, control panel, and viewing window. These components work together to ensure efficient bread-making and easy monitoring.
3.1 Identifying Key Components of the Bread Maker
The Williams-Sonoma bread machine is designed with essential components to ensure efficient operation. The bread pan is the core where dough is mixed and baked, featuring a non-stick coating for easy bread removal. A kneading paddle is attached to the pan, responsible for mixing and kneading the dough evenly. The control panel allows users to set timing, temperature, and loaf size, while the display screen provides real-time updates on the baking progress. Additional features include a viewing window for monitoring the bread without opening the lid and a cool-touch exterior for safety. These components work together to streamline the bread-making process, ensuring consistent results. Familiarizing yourself with these parts is crucial for optimal performance and maintenance.
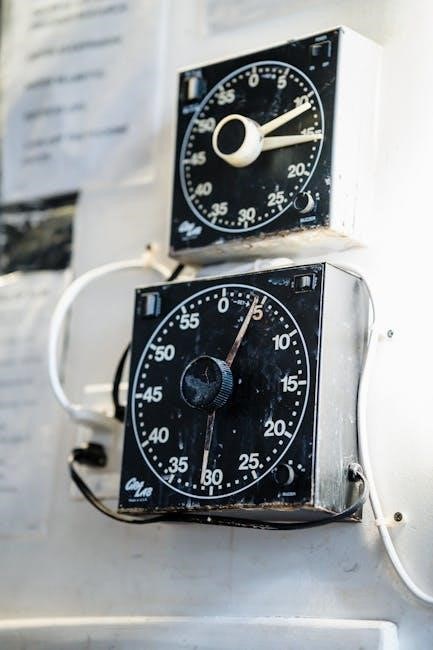
3.2 Functions of the Control Panel and Displays
The control panel is the central interface of the Williams-Sonoma bread machine, offering intuitive buttons and a clear display screen. Users can select from preset programs or customize settings using the PROGRAM function. The START/STOP button allows easy control over the baking process, while the TIMER button enables delayed baking. The CRUST COLOR button adjusts browning levels, ensuring the perfect finish. The LOAF SIZE button lets you choose between small, medium, or large loaves. The DISPLAY SCREEN shows the selected settings, current cycle, and remaining time, providing real-time feedback. These features make it easy to navigate and customize your bread-making experience, ensuring consistent and delicious results every time. The control panel and display are designed for user convenience, offering precise control and clear monitoring of the baking process.
Operating Instructions for the Williams-Sonoma Bread Machine
The manual provides clear step-by-step guidance for operating the bread machine, including basic functions, custom settings, and troubleshooting, ensuring efficient and successful bread-making experiences.
4.1 Step-by-Step Guide to Basic Operation
Start by installing the bread pan and kneading paddle into the machine. Add ingredients in the order recommended: liquids first, followed by dry ingredients and yeast. Use the control panel to select your desired settings, such as loaf size and crust color. Press the START button to begin the cycle. The machine will automatically mix, knead, rise, and bake the dough. Once the cycle completes, remove the bread pan and let it cool before slicing. Always follow the manual’s guidelines for ingredient measurements and cycle selections. Regularly clean the machine and ensure all parts are properly aligned for optimal performance. This guide ensures a seamless and enjoyable bread-making experience.
4.2 Using the PROGRAM Function for Custom Settings
The PROGRAM function allows users to customize their bread-making experience by adjusting time, temperature, and cycles to suit specific recipes or preferences. To use this feature, press the PROGRAM button and navigate through the menu using the arrow keys. Select the desired cycle phase (e.g., knead, rise, bake) and adjust the timing as needed. This function is ideal for advanced users or those experimenting with unique dough types, such as gluten-free or sourdough. Once settings are finalized, press START to begin the custom cycle. Always refer to the manual for detailed instructions to ensure optimal results and avoid errors. This feature enhances versatility, making the Williams-Sonoma bread machine adaptable to various baking needs.
Recipes and Baking Options
This section explores various recipes and baking options available in the manual, including classic bread, gluten-free, and sweet bread variations. Customization tips are also provided.
5.1 Popular Recipes Included in the Manual
The Williams-Sonoma bread machine manual features a variety of delicious and easy-to-follow recipes, catering to both beginners and experienced bakers. Classic options include basic white bread, whole wheat, and sourdough, while specialty recipes like gluten-free, herb-infused, and sweet breads provide versatility. The manual also includes recipes for pizza dough, baguettes, and even sweet treats like cinnamon rolls. Detailed instructions guide users through measuring ingredients, selecting the right settings, and troubleshooting common issues. Customization tips allow users to experiment with flavors and ingredients, ensuring every loaf meets their preferences. With clear, step-by-step directions and expert advice, the manual empowers users to create a wide range of breads with ease and confidence.
5.2 Tips for Customizing Your Bread Recipes
The Williams-Sonoma bread machine manual offers practical tips for tailoring recipes to your taste preferences. Experiment with ingredients like nuts, herbs, or seeds for unique flavors. Adjust yeast amounts based on environmental conditions and dough consistency. For sweeter breads, increase sugar content or add honey. The PROGRAM function allows customization of baking times and cycles, enabling precise control over crust color and texture. Substitute flours, such as whole wheat or rye, for variety, and explore gluten-free options for dietary needs. Temperature adjustments can enhance rise and texture. Always document your modifications to refine future batches. These tips empower users to create personalized bread recipes, ensuring every loaf is a perfect match for their tastes and dietary requirements.
Maintenance and Troubleshooting
Regularly clean the bread maker, paying attention to the bread pan and paddles. Check for blockages and ensure proper functioning. Refer to the manual for troubleshooting common issues like stuck paddles or uneven baking. Proper maintenance extends the machine’s lifespan and ensures consistent performance. Addressing problems promptly prevents further damage and keeps your bread maker in optimal condition for years of reliable use. Always follow the manufacturer’s guidelines for care and repairs to maintain warranty coverage and safety standards. This ensures your Williams-Sonoma bread machine continues to deliver perfect results every time. Regular descaling and lubrication of moving parts are also recommended. Always unplug the machine before cleaning or performing maintenance tasks to avoid accidents. If issues persist, contact customer support for professional assistance. Keep the user manual handy for quick reference during troubleshooting; Cleaning the machine after each use prevents dough residue buildup and maintains hygiene. For stubborn stains, soak removable parts in warm soapy water before scrubbing gently. Avoid using abrasive cleaners or scrubbers that could damage the finish. Properly drying all components after cleaning prevents rust and mold growth. Store the machine in a cool, dry place when not in use to preserve its functionality. Following these maintenance tips ensures your bread maker remains efficient and continues to produce high-quality bread. Troubleshooting common issues like error codes or uneven baking can often be resolved by consulting the manual or adjusting settings. If the machine is not heating properly, check the power supply and thermostat. For dough that doesn’t rise, ensure yeast is active and ingredients are at room temperature. Addressing these issues promptly ensures consistent baking results. Always measure ingredients accurately and follow the recommended order when adding them to the bread pan. This helps the machine process the dough correctly and prevents operational issues. If the machine is noisy during operation, check for loose parts or uneven surfaces. Leveling the machine ensures smooth operation and even baking. If the machine overheats, allow it to cool down before restarting. Overloading the machine can lead to poor results, so adhere to the recommended capacity guidelines. Regularly inspect and replace worn-out parts, such as paddles or seals, to maintain performance. Keep track of maintenance tasks to ensure the machine remains in good working order. Proper care and timely troubleshooting are essential for extending the lifespan of your Williams-Sonoma bread machine and enjoying years of reliable service. Always prioritize safety when performing maintenance or repairs, and consult professionals if needed. This comprehensive approach ensures your bread maker continues to be a trusted companion in your culinary journey.
6.1 Cleaning and Caring for the Bread Maker
Regular cleaning is essential to maintain the performance and longevity of your Williams-Sonoma bread machine. After each use, unplug the machine and allow it to cool before cleaning. Wipe the exterior with a damp cloth and avoid using abrasive cleaners or scrubbers. The bread pan and paddles can be removed and washed with mild soap and warm water. For tough dough residue, soak the pan in soapy boiling water overnight. Dry all components thoroughly to prevent rust. Regularly inspect and clean the interior, paying attention to crevices where flour and crumbs may accumulate. Avoid immersing the machine in water or exposing electrical parts to moisture. For stubborn stains, mix equal parts water and white vinegar on a soft cloth and gently scrub. Always dry the machine and its parts before storing. Proper care ensures optimal functionality and prevents the growth of mold or mildew. Cleaning regularly also maintains hygiene and freshness in your baked goods. Refer to the manual for specific cleaning instructions tailored to your model. By following these steps, you can keep your bread maker in excellent condition and enjoy consistent baking results. Regular maintenance and careful cleaning are key to extending the lifespan of your Williams-Sonoma bread machine. Always store the machine in a dry, cool place when not in use to preserve its performance. Cleaning after every use prevents dough from hardening and makes future maintenance easier. Use a soft brush to remove crumbs from the interior if necessary. Never use harsh chemicals or bleach, as they may damage the finish or harm the machine’s components. Always ensure the machine is completely dry before plugging it back in or using it again. Proper care and cleaning routines will help your bread maker continue to deliver perfect results for years to come. Regularly cleaning the machine also prevents odors and ensures a fresh baking environment. If you notice any discoloration or stubborn stains, repeat the cleaning process until the machine is spotless. Always refer to the manual for specific cleaning recommendations to avoid voiding the warranty. By taking the time to properly care for your bread maker, you can enjoy baking with confidence and precision. Cleaning is a simple yet crucial step in maintaining the quality and performance of your Williams-Sonoma bread machine. Make it a habit to clean thoroughly after each use to ensure reliable operation and delicious bread every time. Proper care also enhances the overall baking experience, allowing you to focus on creativity and experimentation with new recipes. Keep your bread maker in pristine condition with consistent cleaning and maintenance. This will ensure it remains a trusted and efficient kitchen companion for all your baking needs. Regular cleaning and care are essential for maintaining the functionality and hygiene of your Williams-Sonoma bread machine. By following these guidelines, you can enjoy years of trouble-free baking and delicious homemade bread. Always prioritize cleaning and maintenance to keep your machine in optimal working order. Proper care ensures every loaf turns out perfectly, making your investment in the Williams-Sonoma bread machine a worthwhile and long-lasting one. Cleaning and caring for your bread maker is a simple process that yields significant benefits for its performance and longevity. Regular attention to its upkeep will reward you with consistent results and a reliable baking experience. Always make cleaning a priority to keep your machine running smoothly and producing exceptional bread. Proper care and maintenance are the keys to unlocking the full potential of your Williams-Sonoma bread machine. By dedicating time to cleaning and caring for it, you can ensure it remains a vital and efficient tool in your kitchen for years to come. Cleaning and maintenance are not just chores but investments in the quality and longevity of your bread maker. Regular care ensures your Williams-Sonoma bread machine continues to perform at its best, delivering fresh and delicious bread with every use. Always remember that a well-maintained machine is a happy machine, and it will reward you with countless loaves of perfectly baked bread. Proper cleaning and care routines are essential for preserving the functionality and appearance of your Williams-Sonoma bread machine. By following these steps, you can ensure it remains a reliable and efficient addition to your kitchen. Regular cleaning and maintenance are the cornerstones of extending the life of your bread maker and enjoying consistent baking results. Always take the time to clean and care for your machine to keep it in top condition. Cleaning and caring for your Williams-Sonoma bread machine is a straightforward process that requires attention to detail and consistency. By adhering to these guidelines, you can maintain its performance and ensure it continues to be a valuable asset in your culinary endeavors. Regular cleaning and proper care are vital for the longevity and effectiveness of your bread maker. Make it a habit to clean thoroughly after each use and perform routine maintenance to keep your machine in excellent working order. Proper care ensures your Williams-Sonoma bread machine remains a trusted companion in your baking journey, delivering delicious results for years to come. Always prioritize cleaning and maintenance to keep your bread maker functioning optimally and producing high-quality bread. Regular care and attention will reward you with consistent performance and a long-lasting machine. Cleaning and caring for your Williams-Sonoma bread machine is an essential part of its upkeep, ensuring it continues to perform at its best. By following these steps, you can enjoy the benefits of homemade bread with minimal effort and maximum satisfaction. Always remember that a clean and well-maintained machine is the key to perfect baking results. Proper cleaning and care routines will help your bread maker remain efficient and reliable, ensuring every loaf is a success. Regular maintenance and attention to detail are crucial for preserving the quality and functionality of your Williams-Sonoma bread machine. By dedicating time to cleaning and caring for it, you can enjoy a seamless and enjoyable baking experience. Always keep your bread maker clean and well-maintained to ensure it continues to deliver exceptional results. Regular cleaning and care are the foundations of a long and happy relationship with your Williams-Sonoma bread machine. By following these guidelines, you can keep it in pristine condition and enjoy countless hours of baking joy. Cleaning and caring for your bread maker is a simple yet important task that ensures its longevity and performance. Always make it a priority to clean and maintain your machine, and it will reward you with perfect loaves of bread for years to come. Proper care and attention are essential for preserving the functionality and appearance of your Williams-Sonoma bread machine. By adhering to these cleaning and maintenance tips, you can ensure it remains a reliable and efficient kitchen tool. Always remember that a well-cared-for machine is a happy machine, and it will continue to serve you well in your baking endeavors. Regular cleaning and maintenance are the keys to unlocking the full potential of your Williams-Sonoma bread machine. By taking the time to clean and care for it, you can ensure it remains in excellent condition and delivers consistent results. Proper care ensures your bread maker continues to be a valuable asset in your kitchen, providing you with fresh, homemade bread whenever you desire. Always prioritize cleaning and maintenance to keep your machine running smoothly and producing delicious bread. Cleaning and caring for your Williams-Sonoma bread machine is a straightforward process that requires regular attention and care. By following these steps, you can maintain its performance and enjoy years of reliable service. Always remember that proper cleaning and maintenance are essential for the longevity and effectiveness of your bread maker. Regular care ensures your machine continues to function optimally, delivering perfect loaves of bread with every use. Cleaning and caring for your Williams-Sonoma bread machine is an investment in its performance and longevity. By dedicating time to its upkeep, you can ensure it remains a trusted and efficient tool in your kitchen; Always make cleaning and maintenance a priority to keep your bread maker in top condition and enjoy consistent baking results. Proper care ensures your machine continues to deliver delicious bread and remains a reliable companion in your culinary journey. Regular cleaning and maintenance are vital for preserving the functionality and appearance of your Williams-Sonoma bread machine. By following these guidelines, you can ensure it remains in excellent working order and continues to produce exceptional results. Always take the time to clean and care for your machine to keep it running smoothly and efficiently. Cleaning and caring for your Williams-Sonoma bread machine is a simple yet crucial part of its maintenance. By adhering to these steps, you can maintain its performance and enjoy years of trouble-free baking. Always prioritize cleaning and maintenance to keep your machine in optimal condition and ensure it continues to deliver perfect results. Proper care ensures your bread maker remains a valuable asset in your kitchen, providing you with fresh, homemade bread for years to come. Regular cleaning and maintenance are essential for the longevity and effectiveness of
6.2 Common Issues and Solutions
Common issues with the Williams-Sonoma bread machine can often be resolved with simple troubleshooting. If the dough does not rise, check yeast expiration and ensure the correct temperature. For uneven baking, verify proper dough placement and leveling. If the machine is noisy, ensure it is placed on a stable surface and check for worn parts. Stuck paddles can be removed by soaking the bread pan in soapy water. If the machine stops during operation, unplug it, wait, and restart. For incomplete cycles, ensure the power supply is stable. Regularly cleaning the machine prevents dough buildup and maintains performance. Refer to the manual for specific solutions tailored to your model. Addressing these issues promptly ensures optimal functionality and consistent baking results. Always follow the troubleshooting guide in the manual for quick fixes and to prevent further complications. Regular maintenance and proper care can help minimize these common issues.