
ford maintenance guide
Proper Ford maintenance ensures optimal performance, safety, and longevity of your vehicle. Regular checks and adherence to the Ford maintenance schedule prevent costly repairs and keep your car running smoothly.
Overview of Ford Vehicle Care
Regular Ford vehicle care is essential for maintaining your car’s performance, safety, and longevity. It involves following a structured maintenance schedule to ensure all components function optimally. Routine tasks like oil changes, tire rotations, and brake inspections are crucial for preventing breakdowns and costly repairs. Adhering to the manufacturer-recommended schedule helps maintain warranty compliance and ensures your Ford runs efficiently. Proper vehicle care also includes monitoring fluid levels, replacing air filters, and inspecting belts and hoses. By staying proactive, you can address minor issues before they escalate, ensuring your Ford remains reliable and performs at its best. Regular maintenance not only enhances driving comfort but also contributes to overall vehicle health and durability. Ford service departments are equipped to provide expert care, keeping your car in top shape for years to come.
Understanding the Importance of Regular Maintenance
Regular maintenance is crucial for ensuring your Ford vehicle operates safely, efficiently, and reliably. It prevents potential issues from escalating into major repairs, saving time and money. By addressing wear and tear early, you can avoid unexpected breakdowns and maintain optimal performance. Regular checks also enhance fuel efficiency, reduce emissions, and ensure all systems function as intended; Neglecting maintenance can lead to premature part failure, compromising both safety and vehicle longevity. Additionally, following the recommended maintenance schedule helps maintain warranty compliance, ensuring you’re covered in case of unexpected issues. Regular maintenance is an investment in your vehicle’s health, providing peace of mind and ensuring it runs smoothly for years to come. Stay proactive with routine care to keep your Ford performing at its best.
Benefits of Following a Ford Maintenance Schedule
Adhering to a Ford maintenance schedule offers numerous benefits, including extended vehicle life, enhanced performance, and improved fuel efficiency. Regular checks help identify and address issues early, preventing costly repairs and ensuring safety on the road. By following the recommended intervals, you can maintain optimal engine performance, reduce emissions, and enjoy a smoother driving experience. Additionally, staying on schedule helps preserve your vehicle’s resale value, as a well-maintained car is more appealing to potential buyers. Proper maintenance also ensures compliance with warranty terms, providing added protection and peace of mind. Furthermore, routine care can prevent unexpected breakdowns, reducing the risk of accidents and keeping you safe. Overall, following a Ford maintenance schedule is a proactive approach to protecting your investment and ensuring your vehicle runs at its best for years to come.
Ford Scheduled Maintenance Guide
The Ford Scheduled Maintenance Guide outlines essential services at specific intervals to ensure optimal performance, safety, and longevity. Regular tasks like oil changes and tire rotations are crucial for maintaining your vehicle’s health and warranty compliance.
Recommended Maintenance Intervals
Ford vehicles require regular maintenance at specific intervals to ensure reliability and performance. Typically, these intervals are every 5,000 to 7,500 miles for oil changes and filter replacements. Tire rotations are recommended every 6,000 to 8,000 miles to ensure even wear. Brake inspections should occur every 10,000 to 15,000 miles, while spark plug replacements are needed around 30,000 to 100,000 miles, depending on the model. Belt replacements, such as the serpentine belt, are usually scheduled between 50,000 to 90,000 miles. Fluid checks, including coolant and transmission fluid, should be done every 30,000 miles. Following these intervals helps prevent breakdowns, optimizes fuel efficiency, and extends the lifespan of your vehicle. Always consult your owner’s manual for model-specific recommendations, as intervals may vary based on driving conditions and vehicle type.
Oil Change and Filter Replacement Schedule
Regular oil changes are essential for maintaining your Ford’s engine health. Ford recommends changing the engine oil every 5,000 to 7,500 miles, depending on driving conditions. Synthetic oil may extend intervals up to 10,000 miles, but always consult your owner’s manual for specifics. Oil changes lubricate engine components, prevent overheating, and remove contaminants. Neglecting this can lead to premature wear and costly repairs. Additionally, the oil filter should be replaced with every oil change to ensure clean oil circulation. For optimal performance, use Ford-approved oil and filters. Regular oil changes also improve fuel efficiency and reduce emissions. Stay on schedule to keep your engine running smoothly and prolong your vehicle’s lifespan. Proper maintenance ensures reliability and prevents potential issues down the road.
Tire Rotation and Pressure Checks
Proper tire maintenance is crucial for safety, efficiency, and longevity. Ford recommends rotating tires every 5,000 to 8,000 miles to ensure even tread wear and optimal traction. Uneven wear can lead to reduced handling and premature tire replacement. Use Ford’s specified rotation pattern found in your owner’s manual. Additionally, check tire pressure monthly and before long trips. Under-inflated tires can reduce fuel efficiency, increase stopping distances, and risk tire failure. Use a pressure gauge to ensure tires match Ford’s recommended levels, also listed in the manual. Regular tire rotation and pressure checks improve overall vehicle performance and safety. Neglecting these tasks can lead to uneven wear and potential tire failure. Stay proactive with tire care to maintain your Ford’s reliability and ensure a smooth driving experience. Properly maintained tires also contribute to better fuel economy and reduced wear on suspension components.
Brake Inspection and Pad Replacement
Brake maintenance is essential for safety and performance. Ford recommends inspecting brakes every 10,000 to 15,000 miles or when noticing signs of wear, such as squeaking, grinding, or a spongy pedal. During inspections, check brake pads, rotors, and fluid levels. If pads are worn below 1/8 inch, replacement is necessary. Worn pads can damage rotors, leading to costly repairs. Always use Ford-approved parts for replacements to ensure compatibility and reliability. If unsure, consult a certified technician. Regular brake care prevents accidents and maintains your Ford’s stopping power. Neglecting brake maintenance can lead to failure, risking safety. Stay proactive by scheduling inspections and replacements as needed. Properly maintained brakes ensure confidence and control on the road. Follow Ford’s guidelines to keep your vehicle safe and performing at its best. Addressing brake issues promptly avoids more severe problems and maintains overall vehicle integrity.
Fluid Checks and Top-Ups
Regular fluid checks are crucial for maintaining your Ford’s performance and longevity. Engine oil, coolant, transmission fluid, and brake fluid levels should be inspected during routine maintenance. Low fluid levels can lead to overheating, reduced fuel efficiency, or even engine damage. Always use the type of fluid recommended by Ford to ensure compatibility. Check fluids when the engine is warm but turned off for accurate readings. Refer to your owner’s manual for locations of fluid reservoirs and dipsticks. Top up fluids as needed, but avoid overfilling, as this can cause damage. If a fluid level consistently drops, it may indicate a leak or system issue. Address such problems promptly to prevent further damage. Regular fluid checks and top-ups are simple yet effective ways to protect your vehicle and ensure optimal operation. Stay proactive to maintain your Ford’s health and avoid costly repairs down the road.
Common Maintenance Tasks
Regular maintenance tasks like oil changes, tire checks, and air filter inspections ensure your Ford runs smoothly. Follow the recommended schedule to prevent issues and extend vehicle life.
Engine Oil and Filter Replacement
Engine oil and filter replacement is a critical part of maintaining your Ford’s health. Regular oil changes lubricate the engine, prevent overheating, and remove contaminants. Ford recommends oil changes every 5,000 to 7,500 miles, depending on the model and driving conditions. Use synthetic oil for better performance in extreme temperatures. Always replace the oil filter with a new one to ensure proper filtration. Dispose of used oil and filters responsibly. Neglecting this can lead to engine damage, reduced fuel efficiency, and increased emissions. Refer to your owner’s manual for specific guidelines tailored to your vehicle. If unsure, consult a certified Ford technician to ensure the job is done correctly and safely.

Spark Plug Replacement

Spark plug replacement is essential for maintaining your Ford’s engine performance. Spark plugs ignite the fuel-air mixture in the combustion chamber, ensuring proper engine operation. Over time, spark plugs wear out, leading to misfires, reduced fuel efficiency, and rough idling. Ford recommends replacing spark plugs every 30,000 to 100,000 miles, depending on the vehicle model and type of plugs; Signs of worn spark plugs include engine misfires, decreased power, and a drop in fuel efficiency. Failure to replace them can cause damage to the catalytic converter and other engine components. Always use OEM or high-quality aftermarket spark plugs designed for your Ford. If unsure, consult a certified technician to ensure proper installation and gapping. Regular spark plug replacement ensures optimal engine performance, smoother operation, and prevents costly repairs.
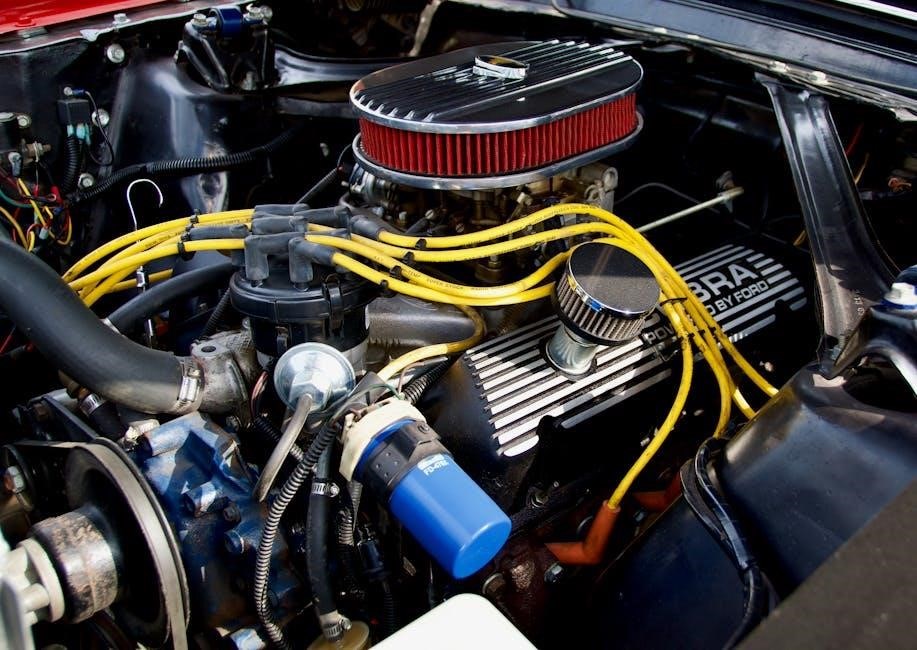
Air Filter Cleaning and Replacement
Air filter cleaning and replacement are vital for maintaining your Ford’s engine performance and fuel efficiency. The air filter ensures clean air enters the engine, preventing dust and debris from causing damage. Over time, the filter becomes clogged, reducing airflow and engine efficiency. Ford recommends inspecting and replacing the air filter every 15,000 to 30,000 miles, depending on driving conditions. Signs of a dirty air filter include reduced fuel efficiency, sluggish acceleration, and rough engine idling. Cleaning or replacing the air filter can improve MPG, restore power, and prevent potential engine damage. For most Ford models, this is a straightforward process that can be done at home with basic tools. Always use a high-quality OEM or aftermarket filter designed for your specific Ford model. Regular air filter maintenance ensures optimal engine performance, better fuel economy, and a cleaner running engine.
Belts and Hoses Inspection
Regular inspection of belts and hoses is essential for preventing unexpected breakdowns and ensuring your Ford runs smoothly. The serpentine belt powers critical systems like the alternator, water pump, and power steering, while hoses transport coolant and other essential fluids. Over time, belts can crack or fray, and hoses may develop leaks or bulges. Ford recommends inspecting these components every 50,000 to 100,000 miles, depending on the model and driving conditions. Look for signs of wear, such as cracks, frays, or soft spots. Replacing worn belts and hoses proactively can prevent costly repairs, like a failed water pump or engine overheating. Always use OEM or high-quality aftermarket parts for replacements to ensure durability. Regular inspections and timely replacements are key to maintaining your Ford’s reliability and performance on the road.
Diagnostics and Warning Lights
Modern Fords use advanced diagnostics and warning lights to alert drivers to potential issues. Understanding these indicators helps identify problems early, ensuring safety and preventing costly repairs. Regular diagnostics are crucial for maintaining optimal vehicle health.
Understanding Ford Dashboard Warning Lights
Ford vehicles are equipped with dashboard warning lights that indicate various system statuses or potential issues. These lights are color-coded: red for critical problems, yellow/orange for caution, and green/blue for system activation. Common lights include the oil pressure warning, battery alert, and engine temperature indicator. Understanding these symbols is essential for timely maintenance and safety. Always consult your owner’s manual for specific light meanings, as they may vary by model. Ignoring warning lights can lead to serious damage or safety risks. If a light illuminates, address the issue promptly, and consider using diagnostic tools like an OBD-II scanner for further insight. Regular checks and professional inspections can help prevent unexpected warnings and keep your Ford running smoothly.
Using OBD-II Scanners for Diagnostics
An OBD-II scanner is a valuable tool for diagnosing issues in your Ford vehicle. Connected to the onboard diagnostics system, it reads trouble codes stored when a dashboard warning light illuminates. This device provides detailed information about engine performance, emissions, and other critical systems. By identifying specific error codes, you can pinpoint problems such as faulty sensors, ignition issues, or emission control malfunctions. Many scanners also offer real-time data monitoring, allowing you to track parameters like engine speed, coolant temperature, and oxygen sensor readings. Compatible with all Ford models manufactured since 1996, OBD-II scanners are user-friendly and accessible for both DIY enthusiasts and professionals. Regular use can help you address minor issues before they escalate, ensuring optimal vehicle performance and reducing repair costs over time. This tool is an essential addition to any Ford maintenance routine, promoting proactive and informed car care.
Ford Parts and Accessories
Genuine Ford parts and accessories are designed to ensure optimal performance, durability, and safety for your vehicle. OEM components are precision-engineered to meet Ford’s high standards, providing reliability and compatibility. Accessories like floor mats, cargo organizers, and tech upgrades enhance functionality and personalization. Always choose OEM parts for guaranteed quality and warranty coverage, maintaining your Ford’s integrity and value over time.

Choosing OEM vs. Aftermarket Parts
When maintaining your Ford, deciding between OEM (Original Equipment Manufacturer) and aftermarket parts is crucial. OEM parts are designed and manufactured by Ford to exact specifications, ensuring perfect fitment, reliability, and performance. They are tested to meet Ford’s quality standards, often coming with a warranty. Aftermarket parts, while generally cheaper, may vary in quality and compatibility. They can offer cost savings but may not match the durability or precision of OEM components. For critical systems, OEM parts are recommended to maintain safety and performance. Aftermarket options are viable for less critical components but should be researched for quality and compatibility. Always consult your Ford manual or a certified technician to make an informed decision based on your vehicle’s needs and your budget.
Essential Tools for DIY Maintenance
A well-equipped toolkit is essential for performing DIY maintenance on your Ford. Basic tools include a socket set, pliers, screwdrivers, and wrenches. A socket set with both metric and SAE sizes is indispensable for most bolt and nut tasks. Pliers and wrenches are handy for gripping and tightening various components. A screwdriver set with flathead and Phillips tips covers most screw types. For more specialized tasks, consider a torque wrench for precise bolt tightening and an OBD-II scanner for diagnosing issues. A multimeter is useful for troubleshooting electrical systems. Jack stands and a drain pan are must-haves for oil changes and underside inspections. A tire pressure gauge ensures proper tire inflation. Work lights and gloves improve visibility and safety. Having the right tools reduces the risk of damage and ensures repairs are done safely. Always refer to your Ford’s manual for specific tool recommendations and build your toolkit as you gain experience.

Troubleshooting Common Issues
Identify common issues by inspecting symptoms like unusual noises, warning lights, or reduced performance. Consult your Ford manual for guidance on diagnosing and addressing problems early to prevent major repairs.
Recognizing Signs of Engine Trouble
Early detection of engine issues is crucial for preventing costly repairs. Common signs include illuminated dashboard warning lights, such as the “Check Engine” light, unusual noises like knocking or grinding, and decreased performance.
Look for symptoms like rough idling, stumbling, or stalling. Excessive smoke from the exhaust or coolant leaks under the hood can also indicate engine trouble. Pay attention to vibrations or loss of power while driving.
Regularly monitor your vehicle’s behavior and consult your Ford maintenance guide for guidance. If you notice any of these signs, address them promptly to avoid further damage. A professional inspection can help diagnose and resolve issues effectively.
Always reference your owner’s manual for specific recommendations tailored to your Ford model. Catching problems early ensures your engine runs smoothly and extends its lifespan.
Stay vigilant and proactive to maintain your Ford’s optimal performance and reliability on the road.
Addressing Transmission Problems
Maintaining a healthy transmission is essential for smooth gear shifting and overall vehicle performance. Signs of transmission trouble include slipping gears, delayed engagement, or unusual noises during acceleration.
Leaking transmission fluid, a burning smell, or erratic RPM behavior are also red flags. If you notice these symptoms, avoid driving excessively and consult your Ford maintenance guide for guidance.
Check the transmission fluid level and condition, as low or dirty fluid can cause issues. Avoid extreme driving conditions, such as frequent stop-and-go traffic or towing heavy loads, which can strain the system.
For persistent problems, a professional inspection is recommended to diagnose and repair faulty components like clutches, bands, or solenoids. Ignoring transmission issues can lead to costly repairs, so addressing them early is critical.
Regular maintenance, such as fluid changes, can help prevent transmission problems and ensure optimal performance. Always follow the recommendations in your Ford manual for transmission care.

Additional Maintenance Tips
Regularly clean your Ford’s exterior and interior to protect paint and upholstery. Organize tools and supplies for easy access. Clean sensors and cameras for optimal functionality.
Sanitize high-touch areas like the steering wheel and dashboard. Check and replace worn-out wiper blades for clear visibility. Keep the gas tank at least a quarter full to prevent moisture buildup.
Inspect and clean the vehicle’s undercarriage to prevent rust. Store your Ford in a shaded area to reduce sun damage. These small steps enhance longevity and performance.
Washer Fluid and Wiper Blade Maintenance
Regular washer fluid checks ensure clear visibility during driving. Use a high-quality fluid suitable for your climate—summer, winter, or all-season. Avoid using household cleaners, as they can damage paint or rubber components.
Inspect wiper blades every 6-12 months or when showing signs of wear, such as streaking or noise. Replace blades immediately if they fail to clear the windshield effectively.
For optimal performance, clean wiper blades with a soft cloth and mild soap. Replace the entire wiper arm if it shows signs of damage. Always refill washer fluid to the recommended level.

Quality wiper blades, such as beam or silicone types, offer superior performance. Keep spare washer fluid in your vehicle for emergencies. Regular maintenance ensures safety and visibility on the road.
Battery Health and Charging Tips
Regular battery maintenance is crucial for reliable engine starting and electrical system performance. Always check terminals for tight connections and signs of corrosion. Clean terminals with a wire brush and apply a protective coating to prevent rust.
Test the battery charge level periodically using a multimeter or ask a professional to assess its condition. A fully charged Ford battery should read around 12.6 volts. Avoid deep discharges, as they can reduce battery lifespan.
When charging, use a compatible charger and follow the manufacturer’s instructions. Avoid overcharging, as it can damage the battery. Inspect the battery casing for cracks or leaks and replace it if necessary.
Store your vehicle in a cool, dry place during extended periods of inactivity. Consider using a trickle charger to maintain the battery’s charge level without overcharging. Replace the battery every 5-7 years or as recommended by Ford.

A well-maintained battery ensures your Ford starts reliably and powers all electrical systems efficiently.

Regular maintenance is key to your Ford’s performance and longevity. Stay informed, follow guidelines, and keep your vehicle running smoothly. Proactive care ensures reliability and safety on the road.
Final Thoughts on Ford Vehicle Maintenance
Regular maintenance is essential for ensuring your Ford vehicle runs efficiently and reliably. By following the recommended schedule and addressing issues promptly, you can prevent costly repairs and extend the life of your car. Always use genuine Ford parts or high-quality alternatives to maintain performance and safety. Stay proactive with inspections, oil changes, and fluid checks to keep your vehicle in optimal condition. Remember, proper care not only enhances your driving experience but also protects your investment. Familiarize yourself with diagnostic tools and warning signs to stay ahead of potential problems. Whether you prefer DIY maintenance or rely on professionals, consistency is key. Take pride in your Ford and enjoy the benefits of a well-maintained vehicle for years to come.
Encouragement to Stay Proactive
Staying proactive with Ford maintenance is a wise investment in your vehicle’s longevity and performance. Regular checks and timely interventions can prevent unexpected breakdowns and costly repairs. By adhering to the recommended maintenance schedule, you ensure your Ford runs smoothly, efficiently, and safely. Proactive care also helps maintain your vehicle’s resale value and reduces the risk of sudden failures. Don’t wait for warning signs—address potential issues early to avoid complications. Consistent effort in maintaining your Ford demonstrates care and responsibility, ensuring it remains a reliable companion for years. Remember, a well-maintained vehicle is not only a pleasure to drive but also a safeguard against future headaches. Stay ahead of maintenance needs and enjoy the peace of mind that comes with knowing your Ford is in top shape.